Introduction
Who can resist an adorable, sweet, and perfectly baked bear-shaped cookie? These delightful treats are not only fun to make but also perfect for kids’ parties, gifts, or simply enjoying with a cup of tea. Whether you’re an experienced baker or a beginner, these homemade cookies are a must-try recipe that brings joy to every bite.
In this article, we’ll explore everything about these cute and tasty treats—from their history and why people love them to a step-by-step recipe, creative decorating ideas, and even healthy alternatives. By the end, you’ll have all the knowledge you need to bake the cutest cookies ever!
If you love experimenting with unique flavors, you might also enjoy this cotton candy cake.
History of Teddy Bear Cookies
The concept of shaped cookies dates back centuries, with different cultures creating biscuits in various forms to celebrate festivals, special occasions, and traditions. However, bear-shaped cookies, as we know them today, gained popularity thanks to the iconic teddy bear toy.
The teddy bear itself was inspired by a hunting trip involving U.S. President Theodore Roosevelt in 1902. A political cartoon depicting Roosevelt sparing a bear cub’s life led to the creation of the first plush bear. Since then, the cuddly toy has become a beloved childhood symbol, influencing everything from stuffed animals to themed desserts.
Baking these adorable treats became a popular activity, especially for children’s parties, baby showers, and holiday celebrations. Their cute shape, combined with a sweet and buttery flavor, makes them a favorite among all age groups.
Why People Love Bear-Themed Cookies
These charming, bite-sized treats have a universal appeal, and here’s why:
1. Perfect for Kids and Families
Children love teddy bears, and combining this love with cookies makes them even more exciting. Baking these cookies together can be a fun family bonding activity, allowing kids to get creative with decorating.
2. Nostalgic and Heartwarming
For many adults, these cute snacks bring back childhood memories. Whether it’s the recognizable shape, the sweet aroma, or the decorating process, they evoke a sense of nostalgia and warmth.
3. Great for Gifting
Homemade gifts always hold special value, and teddy bear cookies make a thoughtful and personalized present. Whether wrapped in decorative boxes or tied with a ribbon, they are perfect for birthdays, holidays, and even baby showers.
4. Customizable and Creative
rom classic butter cookies to chocolate-filled variations, there are countless ways to make them unique. Plus, icing, sprinkles, and edible decorations allow for endless design possibilities.
Ingredients
To bake these delightful treats, you need a combination of simple pantry staples. Below are the essential ingredients, along with some fun variations to customize your cookies.
Basic Ingredients:
- 2 ½ cups (315g) all-purpose flour – The base for your cookie dough.
- 1 cup (225g) unsalted butter, softened – Provides a rich, buttery flavor.
- ¾ cup (150g) granulated sugar – Adds sweetness and texture.
- 1 large egg – Helps bind the dough together.
- 1 teaspoon vanilla extract – Enhances the flavor.
- ½ teaspoon salt – Balances the sweetness.
- ½ teaspoon baking powder – Ensures a slight lift for soft cookies.
Optional Flavor Variations:
- Chocolate Version: Replace ¼ cup of flour with cocoa powder.
- Cinnamon-Spiced Cookies: Add 1 teaspoon of ground cinnamon for a warm flavor.
- Lemon or Orange Zest: Add a teaspoon of zest for a fresh citrusy taste.
- Gluten-Free Option: Substitute all-purpose flour with a gluten-free baking blend.
Essential Baking Tools
Having the right tools makes shaping and decorating these cute treats easier:
1. Teddy Bear Cookie Cutters
- A variety of sizes allows for different designs and themes.
2. Rolling Pin
- Essential for rolling out even dough thickness.
3. Baking Sheet & Parchment Paper
- Prevents sticking and ensures even baking.
4. Mixing Bowls & Whisk
- Used for combining ingredients smoothly.
5. Icing & Decorating Tools
- Piping bags, edible markers, and small candies for details.
Step-by-Step Recipe for Teddy Bear Cookies
Now that you have your ingredients and tools ready, let’s dive into the step-by-step process of making teddy bear cookies!
1: Preparing the Dough
- In a spacious mixing bowl, cream the softened butter and sugar together until the mixture becomes smooth and airy.
- Add the egg and vanilla extract, then mix until well combined.
- In a separate bowl, whisk together flour, salt, and baking powder.
- Slowly incorporate the dry ingredients into the wet mixture, stirring gently until a smooth and pliable dough takes shape.
2: Rolling and Cutting the Cookies
- Lightly flour your work surface and rolling pin.
- Flatten the dough evenly to approximately ¼ inch (6mm) thickness using a rolling pin.
- Use a teddy bear cookie cutter to cut out shapes, placing them on a lined baking sheet.
3: Baking the Cookies
- Preheat your oven to 350°F (175°C).
- Bake cookies for 8-12 minutes, or until the edges turn golden brown.
- Let the cookies rest on the baking sheet for a few minutes before carefully moving them to a wire rack to cool completely.
Creative Decorating Ideas for Teddy Bear Cookies

Once your teddy bear cookies have cooled, it’s time to make them even more adorable with decorations! Here are some fun and easy ways to bring your cookies to life.
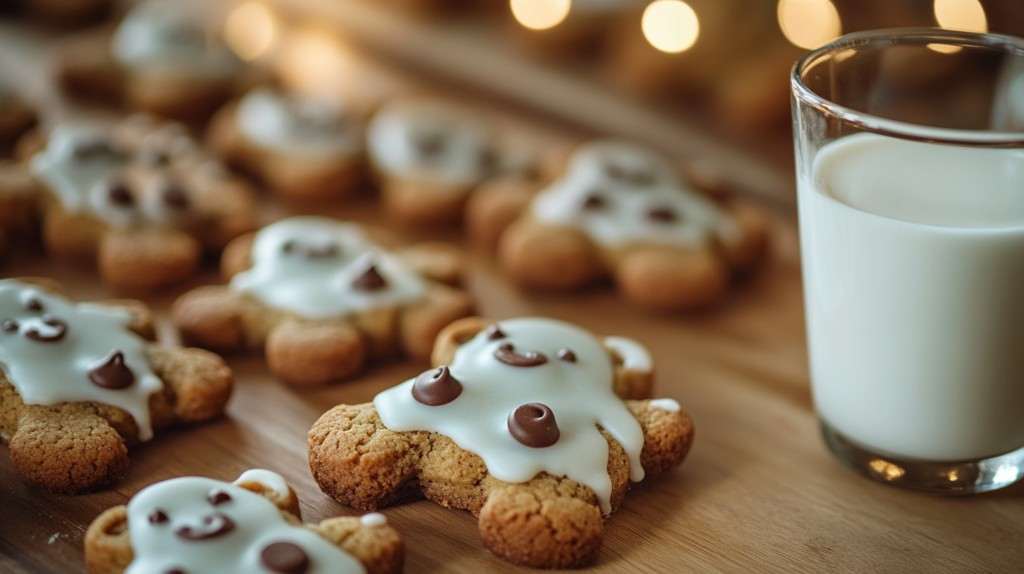
1. Classic Icing Decoration
Using royal icing or a simple powdered sugar glaze, you can outline and fill in your teddy bear cookies. Here’s how:
- Mix 1 cup powdered sugar, 2 tablespoons milk, and ½ teaspoon vanilla extract to create a smooth icing.
- Use a piping bag with a small tip to outline the teddy bear shape.
- Fill in details like eyes, nose, and paws.
- Let the icing set for about an hour before stacking or packaging.
2. Chocolate Dipped Teddy Bears
- Melt ½ cup of chocolate chips (milk, dark, or white chocolate).
- Dip the teddy bear’s ears or feet for a cute effect.
- Sprinkle with crushed nuts, coconut, or sprinkles for extra texture.
3. Edible Markers for Easy Faces
- Use food-safe edible markers to draw cute expressions on the cookies.
- You can add sleepy eyes, winking faces, or tiny smiles for variety.
4. Mini Candy Decorations
- Use chocolate chips or mini M&Ms for the eyes and nose.
- Small pink sugar pearls or candy hearts can make adorable rosy cheeks.
5. Teddy Bear Cookie Sandwiches
- Spread a thin layer of Nutella, peanut butter, or jam between two teddy bear cookies to create sandwich cookies.
Fun Variations to Try

Teddy bear cookies are incredibly versatile! Here are some creative ways to customize them for different occasions:
1. Chocolate Teddy Bear Cookies
- Replace ¼ cup of flour with cocoa powder to create rich chocolate-flavored cookies.
- Decorate with white chocolate details for contrast.
2. Stuffed Teddy Bear Cookies
- Place a small piece of chocolate, caramel, or marshmallow between two layers of cookie dough before baking.
3. Holiday-Themed Teddy Bears
- For Christmas, add red and green sprinkles or tiny Santa hats using icing.
- For Valentine’s Day, shape the teddy bear’s arms to hold a heart-shaped candy.
4. Teddy Bear Paw Print Cookies
- Instead of cutting out full teddy bears, make round cookies and press small chocolate chips into them to resemble paw prints.
If you’re in the mood for more baking adventures, check out our cherry-cookies for a variety of sweet and savory inspirations.
Healthy Alternatives for Teddy Bear Cookies
If you’re looking for a healthier version of teddy bear cookies, here are some modifications to try:
1. Whole Wheat Teddy Bear Cookies
- Replace half of the all-purpose flour with whole wheat flour for a nuttier taste and added fiber.
2. Sugar-Free Option
- Use monk fruit sweetener or coconut sugar instead of granulated sugar.
3. Dairy-Free Cookies
- Swap out butter for coconut oil or a plant-based butter alternative.
4. Gluten-Free Version
- Substitute all-purpose flour with a gluten-free flour blend to make the recipe suitable for gluten-free baking.
Making Teddy Bear Cookies with Kids
Baking teddy bear cookies is a fantastic activity for children! Here are some tips for making it fun and safe:
1. Let Kids Help with Mixing
- Measuring and stirring ingredients can make kids feel involved in the process.
2. Use Kid-Friendly Decorating Tools
- Give children edible markers or small candies to decorate their cookies.
3. Keep It Simple for Younger Kids
- Instead of intricate designs, let kids press chocolate chips into the dough to create eyes and noses before baking.
4. Turn It Into a Storytime Activity
- Read a teddy bear-themed book while the cookies are baking, such as Corduroy or Paddington Bear.
Perfect Occasions for Teddy Bear Cookies
Teddy bear cookies are not just a treat; they’re a perfect addition to various special occasions. Their adorable shape and delicious taste make them a hit at events and celebrations. Here are some of the best occasions to serve or gift teddy bear cookies:
1. Children’s Birthday Parties
- A fun and interactive snack for kids to enjoy.
- You can even set up a decorating station where kids customize their own teddy bear cookies.
2. Baby Showers & Gender Reveals
- Teddy bears symbolize warmth and childhood, making these cookies ideal for baby showers.
- Use pink, blue, or neutral icing to match the theme.
3. Valentine’s Day & Anniversaries
- Shape teddy bear cookies to hold heart-shaped candies or write a sweet message with icing.
- Package them in a cute box as a homemade gift for loved ones.
4. Holiday Celebrations
- Decorate teddy bear cookies with red scarves and Santa hats for Christmas.
- Use pastel icing and small candy eggs for an Easter-themed bear.
5. School Lunches & Bake Sales
- A fun and nutritious homemade treat for kids’ lunchboxes.
- Bake a batch for a school fundraiser or bake sale.
6. Get-Well or Comfort Gifts
- Nothing says “feel better soon” like a homemade batch of teddy bear cookies wrapped in a warm, cozy package.
Packaging and Gifting Ideas

If you’re giving teddy bear cookies as a gift, creative packaging can make them even more special. Here are some ideas:
1. DIY Cookie Jars
- Layer teddy bear cookies in a glass jar, tie it with a ribbon, and add a cute note.
- Perfect for gifting during the holidays or as a thank-you present.
2. Teddy Bear Cookie Boxes
- Place cookies in a decorated cardboard or tin box with a teddy bear-themed design.
- You can buy themed boxes online or make your own with stickers and wrapping paper.
3. Individual Cookie Wrappers
- Wrap each teddy bear cookie in clear cellophane bags and tie with a ribbon.
- Add a personalized tag for a special touch.
4. Gift Baskets
- Combine teddy bear cookies with a small teddy bear plushie, hot cocoa mix, or tea bags to create a cozy gift basket.
5. Personalized Notes
- Attach a small handwritten note or tag that says “Handmade with Love” or “You’re Beary Special!”
Common Baking Mistakes & How to Fix Them
Even the best bakers run into issues! Here are some common teddy bear cookie mistakes and how to avoid them:
1. Dough Is Too Sticky
- Solution: Chill the dough for 30 minutes before rolling it out. If it’s still sticky, lightly dust your surface with flour.
2. Cookies Spread Too Much
- Solution: Make sure the butter isn’t too soft. Also, measure the flour correctly and avoid overmixing the dough.
3. Cookies Are Too Hard or Dry
- Solution: Reduce baking time slightly and check your oven temperature. Overbaking can cause dry cookies.
4. Shapes Lose Detail After Baking
- Solution: After cutting out shapes, chill the cut cookies on the baking tray for 10 minutes before baking. This helps them hold their shape.
5. Decorations Don’t Stick
- Solution: Use a thin layer of icing as “glue” for candies, sprinkles, or chocolate chips.
FAQs About Teddy Bear Cookies
1. How long do teddy bear cookies last?
Teddy bear cookies stay fresh for up to a week when stored in an airtight container at room temperature.
2. Can I freeze teddy bear cookie dough?
Yes! Wrap the dough in plastic wrap and freeze for up to 3 months. Thaw it in the fridge before rolling and baking.
3. How can I make the cookies softer?
For softer cookies, slightly reduce the baking time and store them in an airtight container with a small piece of bread to retain moisture.
4. Can I use premade dough for teddy bear cookies?
Absolutely! You can use store-bought sugar cookie dough and simply cut it into teddy bear shapes.
5. How do I prevent cookies from breaking?
Let cookies cool completely before handling them. If they’re delicate, roll the dough slightly thicker for sturdier cookies.
6. What’s the best way to transport teddy bear cookies?
Stack them carefully in a cookie tin or box with parchment paper between layers to prevent breakage.
Conclusion
Teddy bear cookies are more than just a sweet treat—they bring joy, nostalgia, and creativity to any occasion. Whether you’re baking them for a child’s birthday, gifting them to a loved one, or just having fun in the kitchen, these adorable cookies are always a hit.
With easy-to-follow steps, creative decorating ideas, and fun variations, you’re now ready to bake the cutest teddy bear cookies ever! So grab your cookie cutters and get started on a batch of delicious, cuddly treats. Happy baking! 🧸🍪